Woodworking is an age-old craft that blends skill, creativity, and precision. Among the many forms of woodworking, creating a table with artistic curves is one of the most visually stunning and challenging projects. A table with curves not only serves as a functional piece of furniture but also becomes a work of art that can transform any space. Here’s a glimpse into the process of building a table with artistic curves and the craftsmanship involved.
1. Choosing the Right Wood
The first step in creating a table with artistic curves is selecting the right type of wood. Hardwood options like oak, walnut, or maple are popular choices due to their durability and rich grain patterns. For artistic curves, the wood should be flexible enough to bend or be shaped without cracking. Maple or cherry is ideal for those looking for both aesthetic beauty and strength.
Tip: Select wood that has minimal defects and a consistent grain pattern for the best results.
2. Designing the Curves
The design of the curves is what sets an artistic table apart from conventional furniture. Curved elements can be incorporated into the table’s legs, edges, or top surface. Designers often use sketching or 3D modeling software to plan the curves before cutting. The design process requires precision and a clear understanding of how curves will impact the table’s balance, functionality, and aesthetic appeal.
- Table Legs: Artistic curves in the legs can add elegance and flair. Common styles include spiral, tapered, or fluid, flowing lines that resemble natural forms.
- Table Edges: Curved edges can soften the look of a table, making it feel more organic and inviting.
3. Shaping the Wood
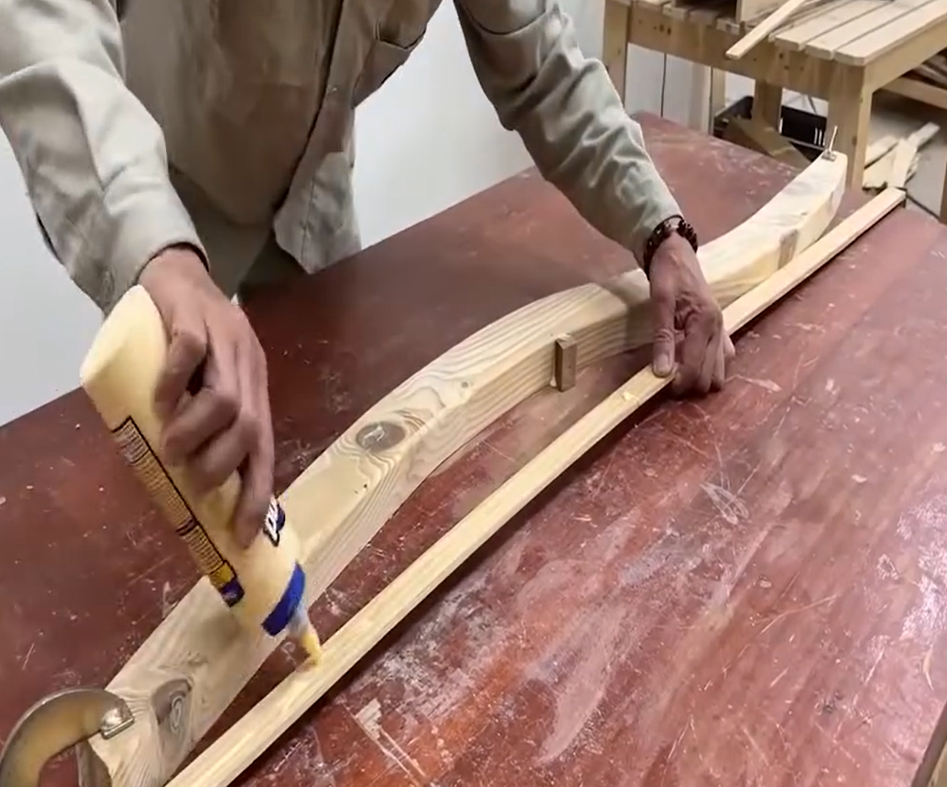
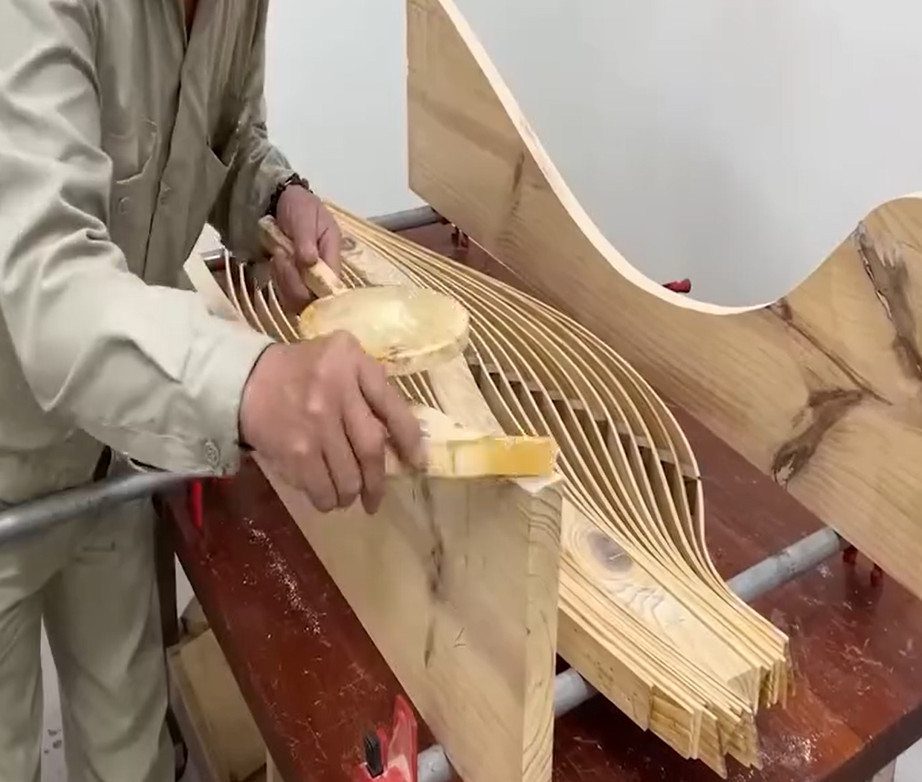
Once the design is finalized, it’s time to shape the wood. For creating curves, steam bending is a traditional technique where wood is exposed to steam to make it flexible enough to bend into shape. Alternatively, laminated bending can be used, where thin layers of wood are glued together and bent to form curves.
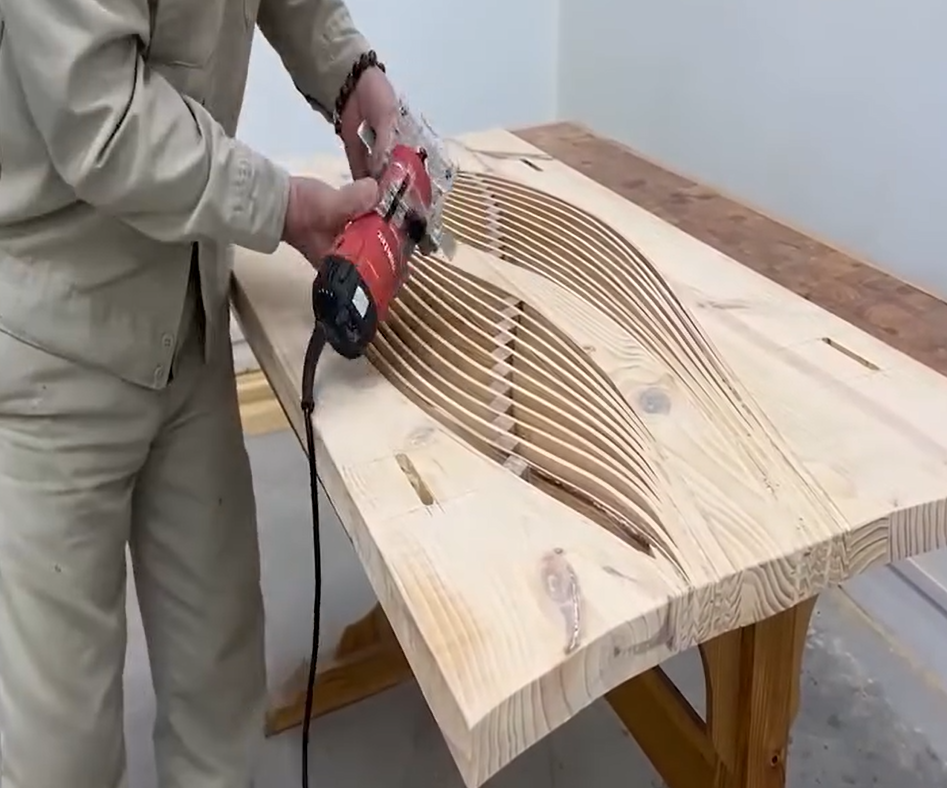
For precision cutting, tools like jigsaws, bandsaws, or router tables are commonly used to carefully carve the desired shape. A steady hand and patience are crucial here, as even slight errors can disrupt the flow of the curves.

4. Sanding and Refining the Curves
After the rough shape is cut, the next step is sanding and refining the curves. Sanding ensures smooth transitions between the curved surfaces, eliminating any rough patches or tool marks. This is done using hand sanders, orbital sanders, and sometimes even files to achieve a perfect, flowing curve.
This process may take several hours, depending on the complexity and size of the curves. It’s important to constantly check the symmetry and smoothness of the curves during sanding.
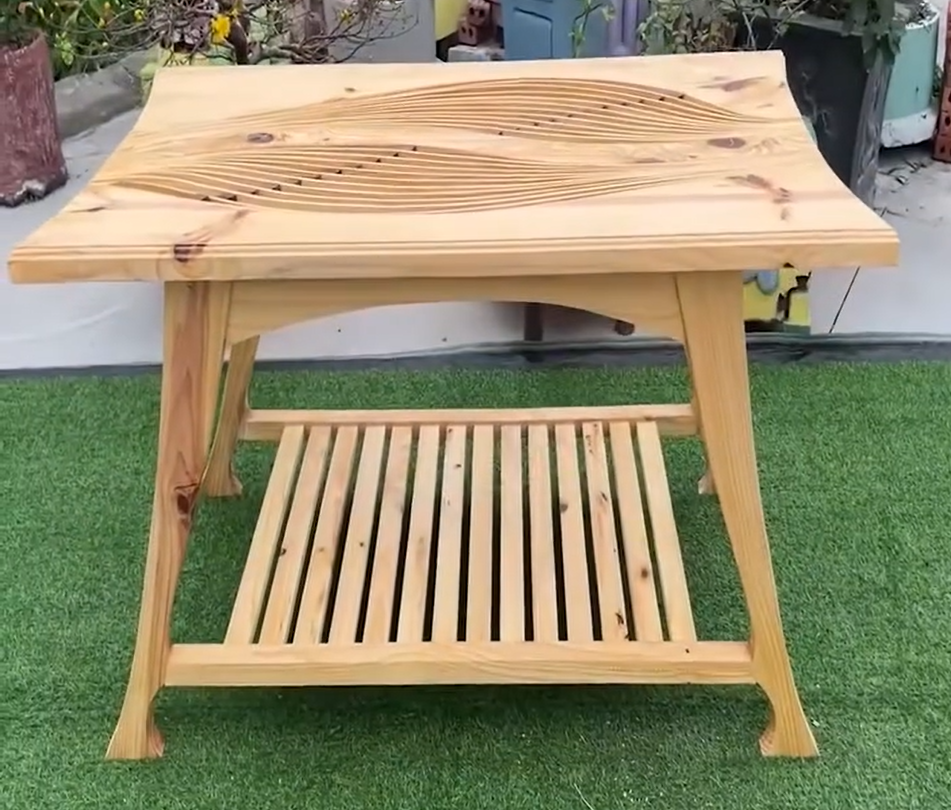
5. Assembly and Finishing Touches
With the pieces cut and shaped, the table is now ready for assembly. The curves need to align perfectly, so attention to detail is essential when joining the top with the legs and ensuring that the entire structure is stable.
Once assembled, the table is ready for finishing. Woodworkers typically apply a combination of wood stain, sealant, and varnish to protect the surface while enhancing the natural beauty of the wood grain. The finish also highlights the curves, giving them depth and warmth.
6. Final Thoughts
Building a table with artistic curves is a rewarding challenge that requires patience, precision, and creativity. The final result is not just a piece of furniture, but a functional piece of art that can serve as the centerpiece of any room. Whether it’s a flowing, organic shape or a modern geometric design, curves in woodworking can transform a simple table into an elegant statement.
With the right tools, techniques, and attention to detail, creating a table with artistic curves is a stunning achievement that showcases the true beauty of wood as a medium for art.